


EUR
en
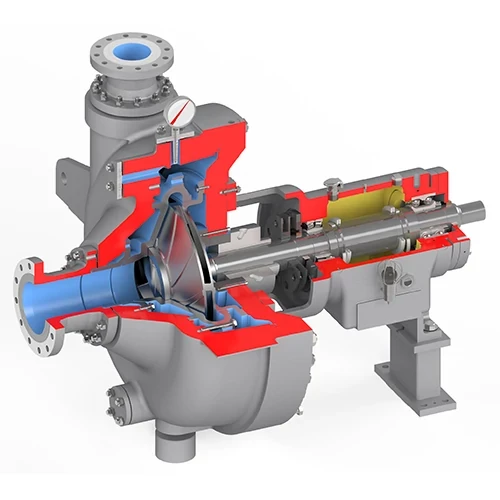
As a supplier of Slurry Transfer Tanks, I've received numerous inquiries about the proper installation of pumps on these tanks. Installing a pump on a Slurry Transfer Tank is a critical process that requires careful planning, the right tools, and a good understanding of the equipment. In this blog, I'll guide you through the step - by - step process of installing a pump on a Slurry Transfer Tank, ensuring that you can complete the task safely and efficiently.
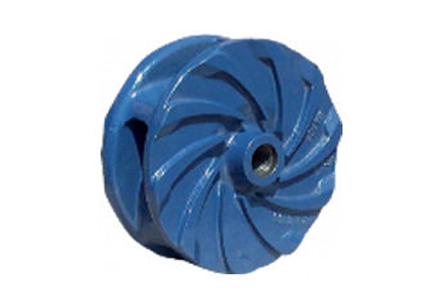
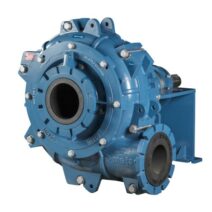
Before you start the installation, it's essential to gather all the necessary tools and materials. You'll need a set of wrenches, a screwdriver, a pipe cutter, Teflon tape, a level, and of course, the pump itself. Make sure the pump is the right size and type for your Slurry Transfer Tank. Different tanks may have different flow requirements, and choosing the correct pump is crucial for optimal performance.
Inspect the Slurry Transfer Tank thoroughly. Check for any signs of damage or leaks. Ensure that the tank is clean and free from any debris that could potentially clog the pump. If you're using a Lithium Battery Slurry Transfer Tank, it's especially important to maintain a high level of cleanliness to prevent contamination of the slurry.
The location where you install the pump on the Slurry Transfer Tank is vital. First, consider the accessibility of the pump for maintenance and repairs. You should be able to easily reach all parts of the pump without having to remove other components of the tank system.
The pump should be installed at a location that allows for proper suction. The suction line should be as short and straight as possible to minimize friction losses. Avoid sharp bends or long, convoluted pipes in the suction line, as these can reduce the pump's efficiency.
If your Slurry Transfer Tank is used in a lithium - battery production line, and you're dealing with a Lithium Battery Paste Premix Tank, ensure that the pump installation does not interfere with the mixing process or the flow of the premix.
Once you've selected the installation location, it's time to mount the pump. Use a level to ensure that the pump is installed perfectly horizontal. This is important for the proper operation of the pump and to prevent premature wear on its components.
Attach the pump to the mounting bracket or the tank using the appropriate bolts and nuts. Make sure the connections are tight to prevent any vibrations that could damage the pump or the tank over time.
The next step is to connect the suction and discharge pipes to the pump. Start with the suction pipe. Cut the pipe to the appropriate length using a pipe cutter. Apply Teflon tape to the threaded ends of the pipe to create a watertight seal.
Connect the suction pipe to the inlet of the pump. Make sure the connection is secure and there are no gaps. Then, connect the discharge pipe to the outlet of the pump. The discharge pipe should be routed to the desired location, such as a Mixing Kettle or another storage container.
When connecting the pipes, ensure that they are properly supported to prevent sagging or stress on the pump connections. You can use pipe clamps or brackets to secure the pipes in place.
If your pump is electrically powered, you need to make the electrical connections carefully. First, ensure that the power supply matches the voltage and current requirements of the pump. Consult the pump's manual for the specific electrical specifications.
Connect the pump to the power source using the appropriate electrical cables. Make sure all connections are insulated to prevent electrical shocks. It's also a good idea to install a circuit breaker or a fuse to protect the pump from over - current situations.
After completing the installation, it's time to test the pump. Fill the Slurry Transfer Tank with water or the appropriate slurry. This will help to prime the pump and ensure that it can operate smoothly.
Turn on the pump and observe its operation. Check for any leaks around the pump and the pipe connections. Listen for any unusual noises, which could indicate a problem with the pump's operation.
Monitor the flow rate and pressure of the pump. Compare the readings with the pump's specifications to ensure that it is operating within the normal range. If you notice any issues, such as low flow rate or high pressure, stop the pump immediately and troubleshoot the problem.
Regular maintenance is essential to keep the pump and the Slurry Transfer Tank in good working condition. Check the pump's lubrication levels regularly, and replace the lubricant as recommended by the manufacturer.
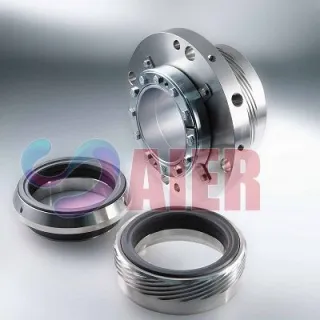
Inspect the pump's seals and gaskets for signs of wear or damage. Replace them if necessary to prevent leaks. Clean the pump's filters regularly to prevent clogging, which can reduce the pump's efficiency.
In case of any problems, refer to the pump's manual for troubleshooting tips. Common issues include clogged filters, worn - out seals, or electrical problems. If you're unable to resolve the problem on your own, don't hesitate to contact a professional technician.
Installing a pump on a Slurry Transfer Tank is a complex but achievable task. By following the steps outlined in this blog, you can ensure a successful installation and a long - lasting, efficient operation of your pump and tank system.
Bookmark
Daniel Féau processes personal data in order to optimise communication with our sales leads, our future clients and our established clients.


This site is protected by reCAPTCHA and the Google Privacy Policy and Terms of Service apply.