


EUR
en
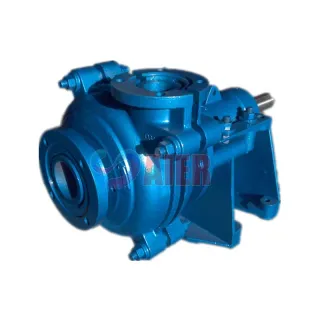
A self-priming sludge pump is a crucial piece of equipment in many industrial and municipal applications, designed to handle thick and abrasive slurries efficiently. However, it can be frustrating when you encounter issues with the pump failing to prime. In this blog post, I'll guide you through the common causes and solutions to get your self-priming sludge pump up and running smoothly again. The self-priming mechanism relies on creating a vacuum within the pump casing to draw in the liquid and expel air. This process typically involves filling the pump casing with liquid, which forms a seal and allows the impeller to generate the necessary suction. Once the air is removed, the pump can start pumping the sludge effectively.
Air leaks are one of the most common causes of priming issues in self-priming sludge pumps. Any breach in the suction line, pump casing, or connections can allow air to enter the system, preventing the pump from creating a proper vacuum. Common sources of air leaks include loose fittings, cracked pipes, or damaged gaskets.
A clogged suction line can restrict the flow of sludge into the pump, making it difficult for the pump to prime. Debris, such as rocks, sticks, or large solids, can accumulate in the suction line over time, blocking the passage of the liquid. This can also cause the pump to overheat and damage the impeller.
If the pump casing is not filled with enough priming liquid, the pump may not be able to create a proper seal and generate the necessary suction. This can happen if the priming tank is empty or if there is a problem with the priming system.
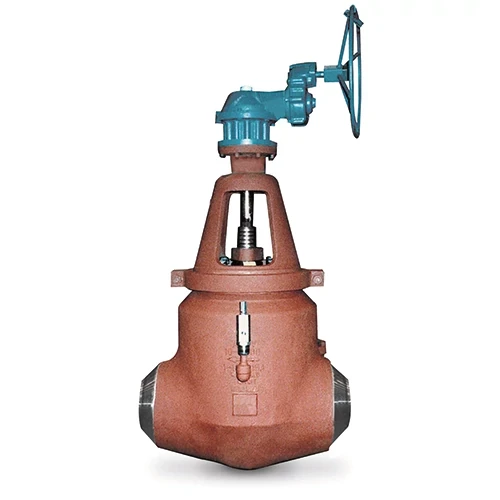
The check valve is a crucial component in the self-priming process, as it prevents the backflow of liquid from the discharge line into the pump casing. If the check valve is damaged or not functioning correctly, it can allow air to enter the system, causing priming problems.
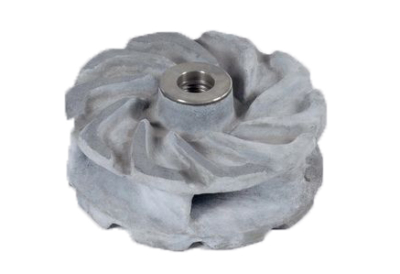
Over time, the impeller in the self-priming sludge pump can wear out due to the abrasive nature of the sludge. A worn impeller can reduce the pump's efficiency and make it difficult to prime. Signs of a worn impeller include reduced flow rate, increased noise, and vibration.
The first step in troubleshooting a self-priming sludge pump that won't prime is to check for air leaks. Inspect the suction line, pump casing, and all connections for any signs of damage or looseness. Tighten any loose fittings and replace any damaged gaskets or pipes. You can also use a pressure gauge to check for air leaks in the system.
If you suspect that the suction line is clogged, you can try to clear it using a high-pressure water jet or a pipe snake. Start by shutting off the pump and disconnecting the suction line from the pump. Then, insert the water jet or pipe snake into the suction line and use it to dislodge any debris. Once the suction line is clear, reconnect it to the pump and try priming the pump again.
Make sure that the pump casing is filled with enough priming liquid. Check the priming tank to ensure that it is full and that there are no leaks. If the priming tank is empty, fill it with clean water or the appropriate priming liquid. You may also need to check the priming system to ensure that it is functioning correctly.
The check valve is a critical component in the self-priming process, so it's essential to inspect it regularly. Remove the check valve from the pump and check it for any signs of damage or wear. If the check valve is damaged, replace it with a new one. You can also test the check valve by blowing air through it in one direction and checking for any backflow.
If you suspect that the impeller is worn, you can remove it from the pump and inspect it for any signs of damage or wear. Look for any cracks, chips, or excessive wear on the impeller blades. If the impeller is worn, replace it with a new one. You may also need to check the impeller clearance to ensure that it is within the manufacturer's specifications.
Always follow the manufacturer's instructions when installing, operating, and maintaining your self-priming sludge pump. This will help ensure that the pump is used correctly and that any potential problems are addressed promptly.
Using the right priming liquid is essential for the proper operation of your self-priming sludge pump. Make sure to use a priming liquid that is compatible with the pump and the sludge you are pumping. Avoid using water that contains high levels of solids or chemicals, as this can damage the pump.
Regular maintenance is crucial for the long-term performance of your self-priming sludge pump. Make sure to schedule regular inspections, cleaning, and lubrication of the pump and its components. This will help prevent any potential problems and ensure that the pump is operating at its best.
If you are unable to troubleshoot the priming problem on your own, don't hesitate to seek professional help. A qualified technician can diagnose the problem and recommend the appropriate solution. They can also provide you with regular maintenance services to keep your pump in good working condition.
Troubleshooting a self-priming sludge pump that won't prime can be a challenging task, but with the right knowledge and tools, it can be done. By understanding the common causes of priming problems and following the troubleshooting steps outlined in this blog post, you can get your pump up and running smoothly again. Remember to always follow the manufacturer's instructions and seek professional help if needed.
Bookmark
Daniel Féau processes personal data in order to optimise communication with our sales leads, our future clients and our established clients.


This site is protected by reCAPTCHA and the Google Privacy Policy and Terms of Service apply.