


EUR
en
Before diving into complex troubleshooting, start with some basic checks. First, visually inspect the pump for any obvious signs of damage, such as leaks, cracks, or loose connections. Check the power supply to ensure the pump is receiving the correct voltage. A voltage meter can be used to measure the voltage at the pump's electrical connection. If the voltage is too low or too high, it can cause the pump to malfunction.
Next, examine the pump's intake and discharge pipes. Make sure there are no blockages or restrictions that could impede the flow of fluid. A clogged intake can prevent the pump from drawing in water, while a blocked discharge can cause excessive pressure and damage the pump. Use a flashlight to look inside the pipes and remove any debris or foreign objects you find.
The motor is the heart of the vertical pump, and problems with it can lead to pump failure. Check the motor's bearings for wear and tear. Worn bearings can cause the motor to overheat and eventually fail. You can listen for unusual noises coming from the motor, such as grinding or squealing, which may indicate bearing problems.
Inspect the motor's windings for signs of damage, such as burns or shorts. A multimeter can be used to test the resistance of the windings. If the resistance is outside the normal range, it may indicate a problem with the windings. Additionally, check the motor's cooling system to ensure it is functioning properly. Overheating can cause the motor to fail, so make sure the cooling fins are clean and the fan is working.
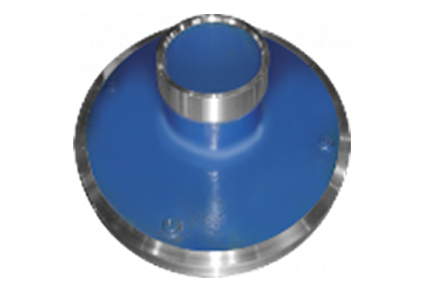
The impeller is responsible for creating the flow of fluid through the pump. If the impeller is damaged or worn, it can reduce the pump's efficiency and performance. Check the impeller for signs of erosion, corrosion, or damage. A damaged impeller may have missing or broken blades, which can cause uneven flow and vibration.
To remove the impeller for inspection, follow the manufacturer's instructions. Some impellers can be removed by loosening a set screw or nut, while others may require special tools. Once the impeller is removed, clean it thoroughly and inspect it for damage. If the impeller is damaged beyond repair, it will need to be replaced.
The seal prevents fluid from leaking out of the pump and into the environment. A faulty seal can cause leaks, which can lead to pump failure and environmental contamination. Check the seal for signs of wear, damage, or leakage. Look for signs of fluid around the seal or on the pump's exterior.
If the seal is damaged, it will need to be replaced. When replacing the seal, make sure to use the correct type and size of seal for your pump. Follow the manufacturer's instructions for installing the seal to ensure a proper fit.
The control system regulates the operation of the pump and ensures it runs safely and efficiently. Check the control system for any error codes or warning lights. If there are error codes, refer to the pump's manual to determine the cause of the problem.
Test the control system's sensors and switches to ensure they are functioning properly. A faulty sensor or switch can cause the pump to operate incorrectly or not at all. Use a multimeter to test the sensors and switches for continuity and proper voltage.
Sometimes, the problem with a vertical pump may not be the pump itself but rather the system in which it is installed. Consider the system design and make sure it is compatible with the pump. For example, the pump's flow rate and head requirements should match the system's demands. If the pump is undersized or oversized for the system, it can lead to problems.
Check the piping layout to ensure it is free from bends, restrictions, or other factors that could affect the pump's performance. A poorly designed piping system can cause excessive pressure drop, which can reduce the pump's efficiency and increase the risk of cavitation.
Bookmark
Daniel Féau processes personal data in order to optimise communication with our sales leads, our future clients and our established clients.


This site is protected by reCAPTCHA and the Google Privacy Policy and Terms of Service apply.