EUR

Excellent supplier product showcase

240 volt dirty water pump

Overhauling of Centrifugal Pumps: Step by Step Guide for Dismantling, Inspecting and Reassembling

    Overview of Centrifugal Pumps

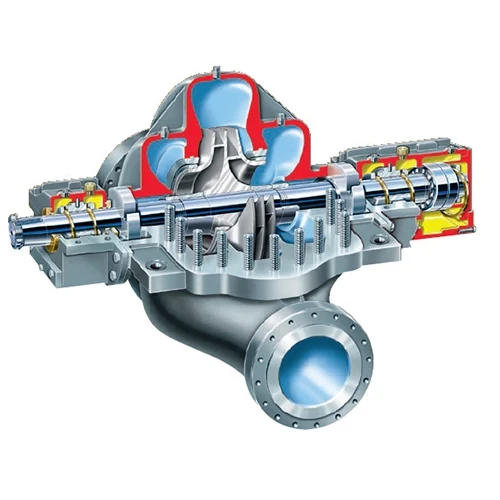
    Centrifugal pumps are one of the oldest pumps. It was invented in the mid-1800s. John Appold designed the current form of these pumps. He replaced the straight vanes of the impeller with curved blades.

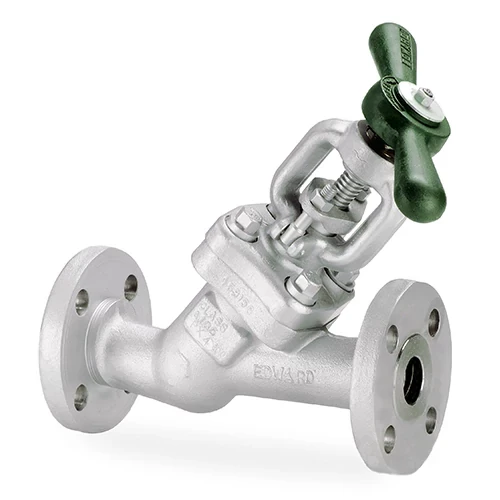
    A centrifugal pump has two main components:

    • The rotating part consists of the impeller, shaft, and volute
    • The stationary component consists of bearings, casing and casing cover

    It converts mechanical energy into kinetic energy. The kinetic energy is then transferred to the displaced liquid. The liquid to be pumped enters the pump via the suction nozzle. From here, it reaches the centre of the impeller. The impeller spins the liquid tangentially. This generates a radial centrifugal force that acts outwards. The curved blades create low pressure in the centre of the impeller, allowing more fluid to be drawn from the impeller’s suction end. The centrifugal force expels the liquid from the discharge nozzle.

    How to start a centrifugal pump the right way?

    The primary purpose of this guide is to help you overhaul a centrifugal pump by yourselves. Before we understand the overhauling procedure, let’s first examine how to start the pump in the right way.

    • Open the suction valve (suction nozzle).
    • Ensure that the discharge valve (discharge nozzle) is kept in the closed position.
    • Turn the pump’s power off.
    • Next, manually turn the shaft (this is the shaft between the pump and motor). Check if there are any obstructions. If you are using large pumps, you may need to wait for a few seconds after turning the shaft to observe the pump’s behaviour.
    • If the shaft is free (without any distractions), Close the discharge valve fully and start the motor.
    • Continue opening the discharge nozzle gradually till it is fully open.
    • Check the pressure. If the pressure is more, you can regulate it with the bypass.

    This method of starting the pump is for centrifugal pumps with automatic air release systems. If your pumps do not have this mechanism, then consult your pump’s manual for the right operational procedure.

    Check if the suction and discharge valves are closed. If not, close them manually. Switch off the power. Disconnect the pump from the main switch or distribution panel. Disconnect the electrical wire. Ensure that you note the rotation direction of the terminals (if you’re using a three face connection). This will help you in connecting the pump the same way after the overhaul. Check if the pump has coupling bolts (beam, bellow, coupling, etc.) If yes, remove all coupling bolts.

    If the pump is mounted vertically,

    • Connect the chain block and pull the motor up
    • Check if water pressure is locked inside.
    • And then open the pump.

    If the pump is mounted horizontally,

    • Loosen the motor base bolt and remove the motor
    • Then, follow the same procedures as mentioned above.

    Loosen the pump impeller joint and pump flanges. Bring out the pump for inspection.

    How to dismantle, inspect, and reassemble a centrifugal pump? Step-by-Step Instructions

    • Start from the impeller side. Loosen the washer and guide nut.
    • Use a pulley to unscrew the impeller.
    • Next, remove the mechanical seal on the impeller.
    • Remove the lock ring/bearing guide pin behind the impeller.
    • Tap gently on the shaft using a rubber or wooden hammer.
    • Remove the bearings along with the shaft.
    • Inspect if the bearings are in good condition. If they are worn out, replace them with new bearings.
      • To change the bearings, first, clean the shaft. Then lubricate it and tap the behind of the bearing groove gently.
      • Before you install the new bearings, clean the groove and lubricate it well.
      • Install the new bearings at the small end, just like you removed it.
    • Clean the housing of the bearing and grease it adequately.
    • Install the shaft from the impeller’s side.
    • Install new mechanical seals, if needed.
    • Install all removed washers.
    • Replace removed nuts and washers and tighten them as needed.
    • Rotate the shaft and check if it can move freely.
    • Check the alignment of the pump and box it.
    • Mount the electric motor and connect the pump.
    • Check for free movement, before starting the pump.

    That’s it. You’re done.

  • Fast shipping
  • Home delivery
  • The promotion is underway
  • Free trial
  • 24/7 online
  • 30-day no-reason return policy
Contact us

Daniel Féau processes personal data in order to optimise communication with our sales leads, our future clients and our established clients.

Read more

Other related products

6 inch slurry pump used

6 inch slurry pump used

centrifugal slurry pumps

centrifugal slurry pumps

d hh slurry pumps

d hh slurry pumps

sludge pump screw type

sludge pump screw type

This site is protected by reCAPTCHA and the Google Privacy Policy and Terms of Service apply.