


EUR
en
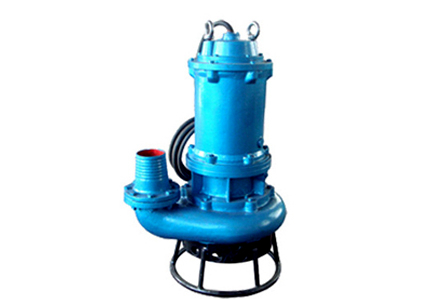
Changing the water pump is likely something you are going to have to accomplish sometime in its long foreseeable lifespan. The 6.7L PowerStroke is a reliable powerhouse whose water pump can be easily replaced. There are various hoses and wire retainers that you must take off but that you should be very careful not to damage. It is almost impossible to not break some or all of them.
This is just an article about replacing the water pump of a Ford 6.7L Powerstroke. The leak location is pretty straight forward. When under the truck looking up, you generally see the coolant running out the drain on the bottom of the pump housing, or coolant leaking directly out of the shaft seal.
You will want to get you a new Ford 6.7L Powerstroke water pump, but you'll also want a few handy tools to get the job done quicker. Essentially you will be stripping the front accessories off to allow access to the water pump.
Drain both radiators. There is a petcock on the drivers side for the main cooling system and one on the passenger side for the auxiliary cooling system. If you drain it into separate suitable pans, you can reuse the majority of the recovered coolant. Remember these engines hold a lot of coolant and should fill a 5 gallon pan.
Remove 8mm air plenum hose retainer, loosen air cleaner housing hose clamp and loosen plenum to intake hose clamp.
Remove bolts from auxiliary coolant reservoir, remove both hoses at top, remove lower larger hose, then squeeze tabs together to remove the fourth hose. You can now move the reservoir out of the way or remove the final fifth hose to completely remove the reservoir. This step is why we drained the secondary system, no other reason.
Remove the coolant hose located in the top passenger corner of the radiator, position both hoses out of the way to allow easy removal of the intake plenum. Remove power steering reservoir bolts, position aside. Remove top radiator shroud cover. 2 bolts on the top, 2 on the passenger side, 1 on the driver side. Pull up to remove. Detach wire harness attachments.
Loosen and unscrew cooling fan from drive assembly. Remove 13mm bolt attaching fan clutch plug to cooling fan drive assembly and unplug the connector. Remove the fan and clutch.
Remove all 4 nuts attaching cooling fan stator, the plastic fan guard. Now you can either remove the lower radiator shroud OR remove the lower fan stator attachment studs by pulling outward on the stator and using a 12mm wrench OR slowly work rubber mold on the bottom of the stator on to the top exposed portion of the lower shroud. The choice of attack is yours to make. Carefully remove stator assembly.
Remove the drive belt tensioner, loosen and remove 4 remaining bolts attaching the cooling fan drive assembly. Now would be the time, if nothing else, to go ahead and tighten those suckers up or maybe even add some lock-tite.
Now you have full access to the water pump. Begin by removing the 7mm bolt attaching the power steering line to the battery cable carrier and then remove 2 bolts attaching the battery cable to the water pump. Remove all bolts on the water pump. There are a few positioned behind the battery cable harness. Some bolts are larger than others. One bolt is somewhat hidden from view, located just below and to the left of the pulley. Once all bolts are removed, remove water pump with a small pry bar or screwdriver but be sure not to damage gasket surface. Look for razed edges to use.
Clean gasket surface, but there shouldn't be much left behind. Install your new water pump. Reverse directions for installation of the remaining parts of the job. Fill the cooling system using your old antifreeze or new if you prefer.
Bookmark
Daniel Féau processes personal data in order to optimise communication with our sales leads, our future clients and our established clients.


This site is protected by reCAPTCHA and the Google Privacy Policy and Terms of Service apply.