


EUR
en
Here’s an introduction to the three main slurry pump seal types, focusing on advantages, disadvantages:
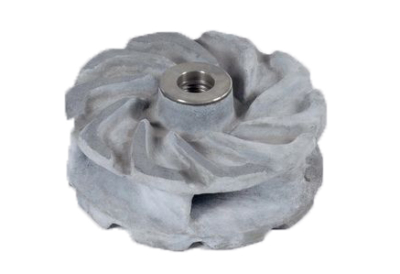
1. Auxiliary Impeller (Expeller) Seal
• How it Works: Uses a small reverse-vane impeller (expeller) mounted on the shaft behind the main impeller. It creates a lower-pressure zone near the shaft seal area, counteracting the pump’s internal pressure and preventing slurry ingress. Often used with a small amount of clean water injection (flush) for optimal sealing in harsh conditions.
• Advantages:
◦ Robust & Simple: No contacting parts to wear out quickly from abrasives. Handles high solids content well.
◦ Low Maintenance: Requires minimal adjustment once set correctly. No regular packing tightening needed.
◦ Leakage Tolerant: Designed to allow a controlled amount of clear liquid leakage (usually the flush water) to the atmosphere, which is acceptable in many slurry applications. This leakage actually helps cool and lubricate.
◦ Good for Coarse Slurries: Less susceptible to damage from large or stringy solids compared to mechanical seals.
• Disadvantages:
◦ Controlled Leakage: Requires a drain path for the leaking flush water, which can be messy and requires management. Not suitable for toxic or hazardous fluids where zero leakage is mandated.
◦ Requires Flush Water: Needs a reliable source of clean (preferably pressurized) flush water, adding operational cost and complexity.
◦ Shaft Sleeve Wear: The shaft sleeve running near the expeller can wear over time, increasing the clearance and reducing sealing effectiveness.
◦ Limited Pressure Range: Effectiveness decreases at very high pump discharge pressures. Requires sufficient pump speed to generate the expelling force.
• Repair When Failed:
1. Isolate & Drain: Safely isolate the pump from power and process, drain the casing.
2. Disassemble: Remove the back cover/cover plate to access the expeller chamber.
3. Inspect: Check the expeller vanes for wear, erosion, or clogging. Inspect the wear ring clearance between the expeller and the back liner/cover. Examine the shaft sleeve for wear at the expeller location.
4. Replace Worn Parts: Replace the expeller if vanes are significantly eroded or damaged. Replace the wear ring(s) if clearances exceed manufacturer specs. Replace the shaft sleeve if worn excessively where the expeller runs.
5. Reassemble: Reassemble the pump, ensuring correct clearances (especially expeller to wear ring). Reconnect flush water lines.
6. Adjust Flush: Ensure clean flush water supply is adequate and pressure is set according to pump specs. Adjust leakage rate if necessary.
2. Packing Gland (Compression Packing) Seal
• How it Works: Uses rings of braided packing material (often graphite, aramid, or PTFE-based) compressed into a stuffing box around the shaft by a gland follower. Requires a controlled amount of clean flush water (lantern ring or quench) injected into the middle of the packing rings to lubricate, cool, and flush away abrasives.
• Advantages:
◦ Simple & Inexpensive: Lowest initial cost of the three options. Simple design.
◦ Repairable: Packing can often be replaced without full pump disassembly. Adjustments (tightening) can be done while running.
◦ Tolerant of Misalignment/Shaft Movement: More forgiving of minor shaft deflection or runout than mechanical seals.
◦ Visible Leakage: Allows controlled, visible leakage (of flush water), indicating function and providing cooling/lubrication.
• Disadvantages:
◦ High Maintenance: Requires regular adjustment (tightening) as packing wears and compresses. Eventually needs complete replacement. Significant ongoing labor cost.
◦ Controlled Leakage: Constant leakage of flush water is required for operation, leading to water consumption and effluent management.
◦ Shaft/Sleeve Wear: Abrasive particles can ingress despite flush, causing significant wear on the shaft or shaft sleeve over time.
◦ Friction & Power Loss: Creates friction against the shaft, consuming more power and generating heat.
◦ Flush Dependency: Performance heavily reliant on consistent, clean flush water supply and pressure.
• Repair When Failed (Leaking Excessively or Overheating):
1. Isolate & Drain: Safely isolate pump and drain casing.
2. Loosen Gland: Back off the gland follower nuts completely.
3. Remove Old Packing: Use packing extraction tools or hooks to carefully remove all old packing rings. Clean the stuffing box thoroughly.
4. Inspect Sleeve: Closely examine the shaft sleeve for wear grooves or scoring. Critical Step:If worn, the sleeve must be replaced (or the shaft repaired) before installing new packing, or it will fail immediately.
5. Install New Packing: Cut new packing rings precisely to the shaft size (butt-cut, not angled). Stagger joints by 90-120 degrees. Insert rings one by one, tamping gently. Install the lantern ring (if used) in the correct position. Follow manufacturer specs for number of rings.
6. Adjust Gland: Hand-tighten the gland follower nuts evenly. Start the pump (with flush ON). Gradually tighten the nuts just enough to achieve a steady drip (typically 5-60 drops per minute) for cooling/lubrication. DO NOT OVERTIGHTEN. Monitor temperature.
7. Re-tighten: Re-tighten slightly after a short run-in period as packing seats, then monitor and adjust periodically during service life.
3. Mechanical Seal
• How it Works: Uses two extremely flat, lapped faces (one rotating with the shaft, one stationary in the seal chamber) held in close contact by springs and hydraulic pressure. Requires a clean barrier fluid (often water or a compatible liquid) injected under pressure to lubricate the faces, flush away heat/abrasives, and prevent solids ingress. Common arrangements are single seals (with flush) or double seals (pressurized barrier fluid between two sets of faces).
• Advantages:
◦ Low/Zero Leakage: Provides the lowest leakage rates (often approaching zero visible leakage with double seals), essential for hazardous, toxic, or expensive fluids or environmental compliance.
◦ Low Friction & Power Loss: Minimal friction compared to packing.
◦ Reduced Shaft Wear: Properly flushed seals prevent abrasives from contacting the shaft/sleeve.
◦ Longer Life (if Protected): Can offer significantly longer mean time between repairs (MTBR) if the flush/barrier system is reliable and clean.
• Disadvantages:
◦ High Initial Cost: Most expensive seal type to purchase.
◦ Complexity & Sensitivity: More complex installation and operation. Highly sensitive to dry running, clogged flush lines, cavitation, vibration, misalignment, and shaft deflection.
◦ Flush/Buffer Dependency: Absolutely critical to have a clean, reliable, correctly pressurized flush or barrier fluid system. Failure of this system causes rapid seal failure.
◦ Catastrophic Failure: Failure often results in sudden, large leakage. Repair requires pump disassembly.
◦ Specialized Repair: Requires careful handling, cleaning, and installation expertise.
• Repair When Failed:
1. Isolate & Drain: Safely isolate pump, drain casing, and depressurize any barrier system.
2. Disassemble Pump: Typically requires removing the back cover or even pulling the rotating assembly/bearing housing to access the seal chamber.
3. Remove Old Seal: Carefully extract the entire mechanical seal assembly (rotating and stationary parts).
4. Critical Inspection:
■ Examine seal faces for chips, cracks, heat checking (bluish color), excessive wear, or embedded solids.
■ Check springs for breakage or corrosion.
■ Inspect O-rings/gaskets for cuts, hardening, swelling, or flattening.
■ Check shaft/sleeve: Look for wear, corrosion, or damage at all seal contact points (O-ring grooves, drive lugs, face mounting area). Repair or replace the shaft/sleeve if damaged.
■ Inspect Seal Chamber: Must be clean, smooth, and free of pitting or damage.
5. Replace Seal: Always replace the complete mechanical seal assembly as a unit. Do not mix old and new components. Ensure the new seal matches the specification exactly (materials, size, arrangement). Lubricate O-rings lightly with appropriate lubricant.
6. Reassemble: Reassemble the pump meticulously, following torque specifications. Ensure the seal faces are perfectly clean and protected during assembly. Avoid knocking or shocking the seal.
7. Flush/Barrier System: MANDATORY: Before starting, verify the flush/barrier fluid system is clean, lines are clear, pressure is set correctly, and flow is established. Start the flush before starting the pump.
8. Startup: Start the pump and monitor closely for leakage, vibration, and temperature. Follow the seal manufacturer’s specific startup procedure.
Bookmark
Daniel Féau processes personal data in order to optimise communication with our sales leads, our future clients and our established clients.


This site is protected by reCAPTCHA and the Google Privacy Policy and Terms of Service apply.